QuadBob's "Holy Grail" CD-4 Modulator Replacement Instructions
These are the directions for
removal/replacement of the
CD-4 demodulator board found in the Sansui
QRX-8001, QRX-9001 & QRX-999
quadraphonic receivers.
| STEP ONE - LOCATE BOARD |
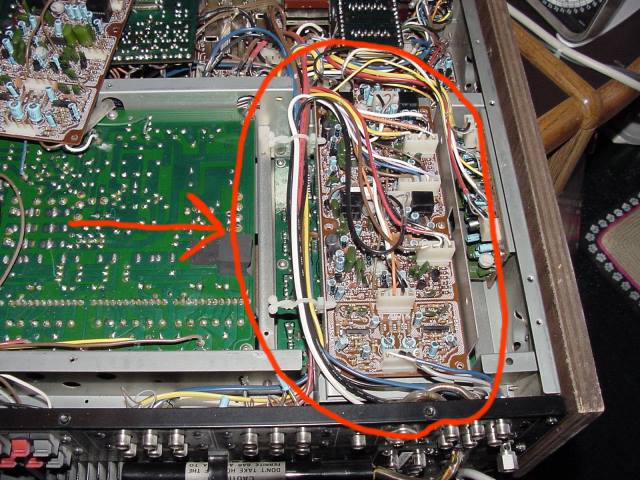 |
| Remove the BOTTOM of the receiver and flip it over on a safe, solid surface. Look to the side of the unit and you will see the CD-4 Board as indicated above. Carefully remove and safely store the screws that hold the board to the chassis |
|
STEP
TWO - DISCONNECT THE REAR CONNECTOR |
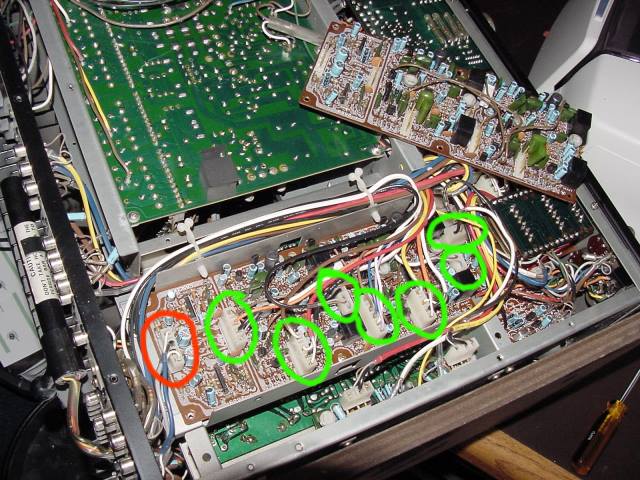 |
| You will see that there is one connector on the board that has its harness head off towards the rear of the unit. In the picture above, it is the one circled in red. Remove this connector from the board and protect it from getting pinched or damaged. LEAVE THE OTHER CONNECTORS ON THE BOARD AND LIFT THE OLD BOARD OUT, still keeping it connected to the other wiring harnesses. |
|
STEP
THREE - INSTALL THE REPLACEMENT BOARD |
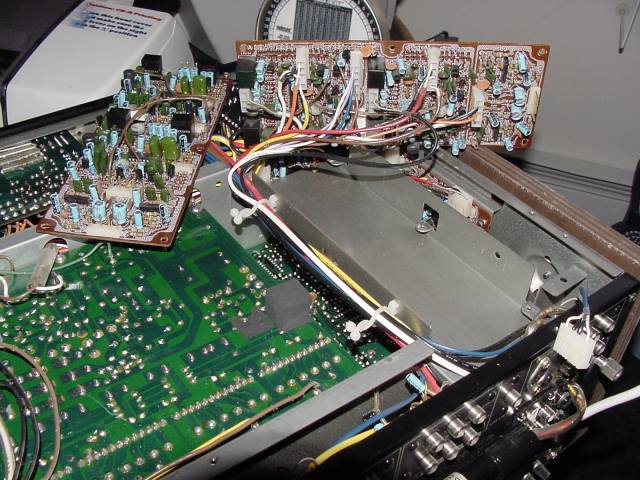 |
| With the old board still connected to the wiring harnesses, install the replacement board into the chassis and secure it with the screws you removed earlier. Make sure the new board is oriented in the same direction as the original board was. |
|
STEP FOUR - CONNECT THE
REMAINING HARNESSES |
 |
| One at a time, remove each connector from the old board and attach it to the new board. Reconnect the rear connector and replace the bottom panel, making sure that all connectors are seated firmly and that all of the screws are tightened. |
| THAT'S IT! YOU ARE DONE! |
Package up your old board and ship it back to QuadBob, then let us know how it works out for you in the forum
For those interested in learning about QuadBob's restoration of vintage audio hardware, you can read more about it by clicking here and going over to obbop's website
|
c2004 QuadraphonicQuad - Updated 1/30/2004