How to Setup an Intel NUC for Kodi

QuadraphonicQuad

Help Support QuadraphonicQuad:

This site may earn a commission from merchant affiliate links, including eBay, Amazon, and others.

HomerJAU

Moderator: MCH Media Players
Staff member
Moderator
Moderator
Joined
Jun 13, 2013
Messages
5,915
Location
Melbourne, Australia
STEP 1: Install NUC components (NUC, memory and disc drive)

EDIT: November 2018: The latest LibreElec/Kodi Leia now supports Hires Multichannel audio on 7th and 8th generation NUCs. No need to find an 5th gen NUC as described here. Installation is same, just use LibreElec 9 or later. This is currently in alpha at 1st Nov 2018 but is very stable. I am using it daily.

-----------------
NOTE: The components to build this Intel NUC Media Player can be found on this post (a little under $400): https://www.quadraphonicquad.com/forums/index.php?threads/media-players-095.24745/#post-367075
-----------------

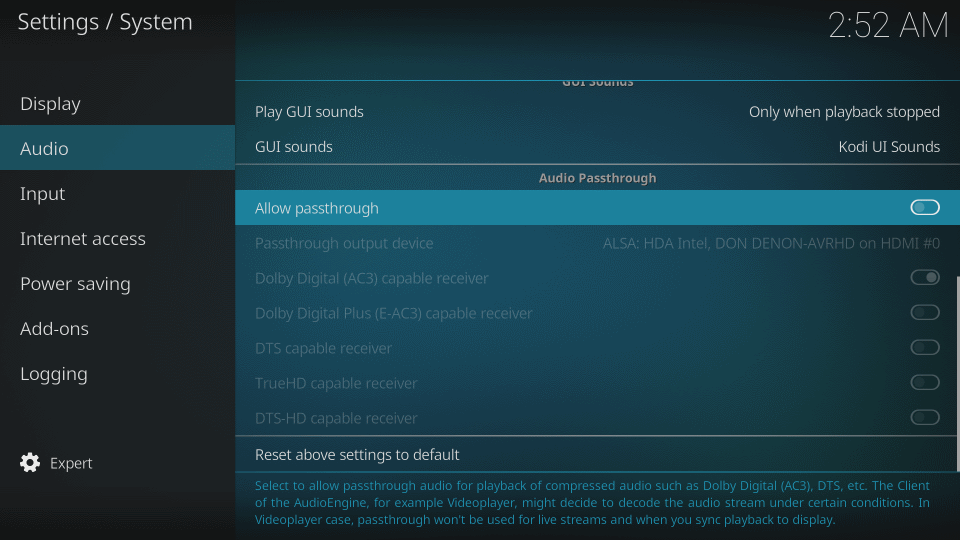
So you've purchased a new Intel NUC to use as a Media Player. Congratulations! This will give you an extremely fast media player for MCH music (up to 7.1 192kHz/24 bit and play 1080p HD video with DTS-HDMA, Atmos hires audio etc via HDMI pass-through to your AVR)

The NUC comes as a 'barebones' micro PC and won't run without adding memory and non-volitile storage (like a disc drive, but I recommend using a solid state SSD drive as these things fly, no moving parts):

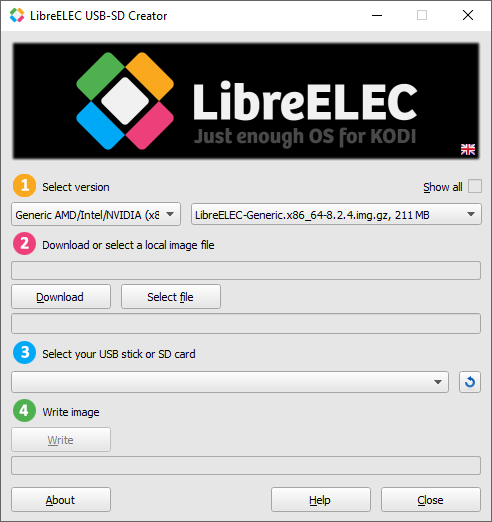
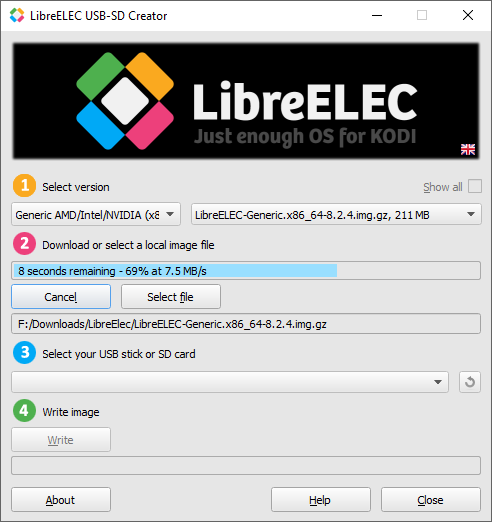
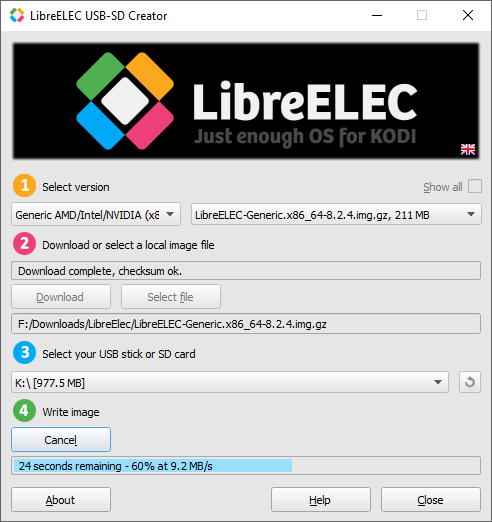
Once your bits arrive, unbox everything. You'll need a small screwdriver to install parts and a USB thumb drive (min 500MB) to install the operating system and Kodi media player software. You will also need a USB keyboard to complete the s/w install and configure Kodi.

1. Turn the NUC upside down:

NUC1Back.jpeg


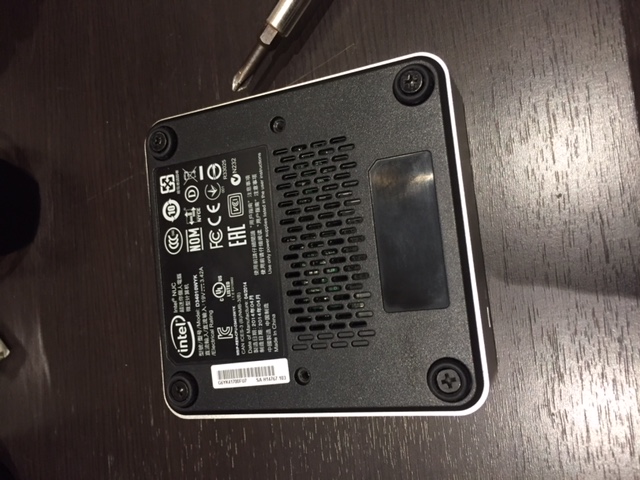
Unscrew the 4 retaining screws in the 'feet' (they won't come completely out). Once loosened you can separate the base (black) from the silver housing (top). You may need to pry it open using a knife or small screw driver. The black base has no electronics, its effectively an upside-down lid. Please note its orientation so you can fit the base back on completion.

2. Once the base is off turn it up with silver top now on desk with all the electronics housed in this section:

NUC2Open.jpeg


On the 4th Gen NUC (in these photos) you will see 4 long sockets. The SSD will fit into the short socket at bottom left of the photo above. The memory fits into the long socket(s) at right marked 1.35V DDR3L

3. Insert the SSD drive

NUC3SSD.jpeg


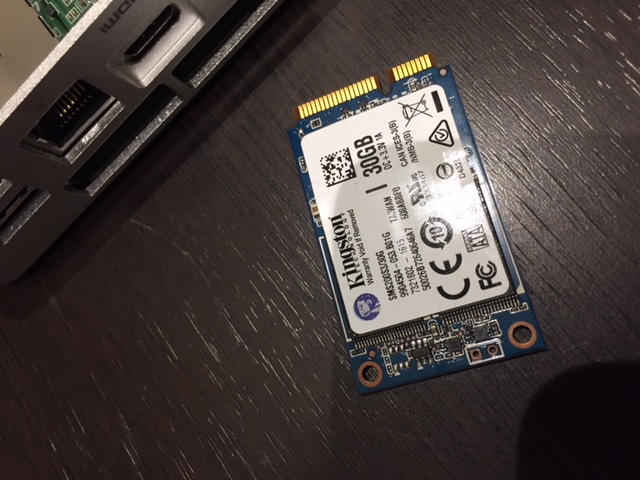
The SSD drive has a SATA style connector. Insert it as follows, but you'll need to unscrew and remove a small screw used to hold down the SSD (where the hole is at extreme top right of next picture)

NUC4SSDInsert.jpeg


Push gently and it will insert and cover all the pins. Now gently push it down to sit flat and screw in the retaining screw in the large hole (see above extreme top right)

4. Insert Memory (NOTE: You may have one single RAM module or you may have two - fit whatever you have)

NUC5MemoryInsert.jpeg


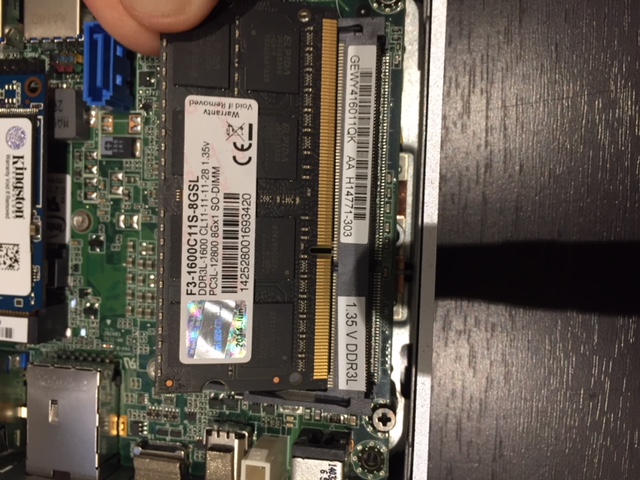
Slide RAM into each socket, ensure the module is correctly oriented. If you have two do the bottom one first. Once inserted push the module gently down flat and it will click into place and be held down.

5. Reassemble

Your done. Please place the top back on the black base (ensure this is oriented properly).

Here’s a YouTube video of someone installing a similar model NUC. Please ignore the wifi module:


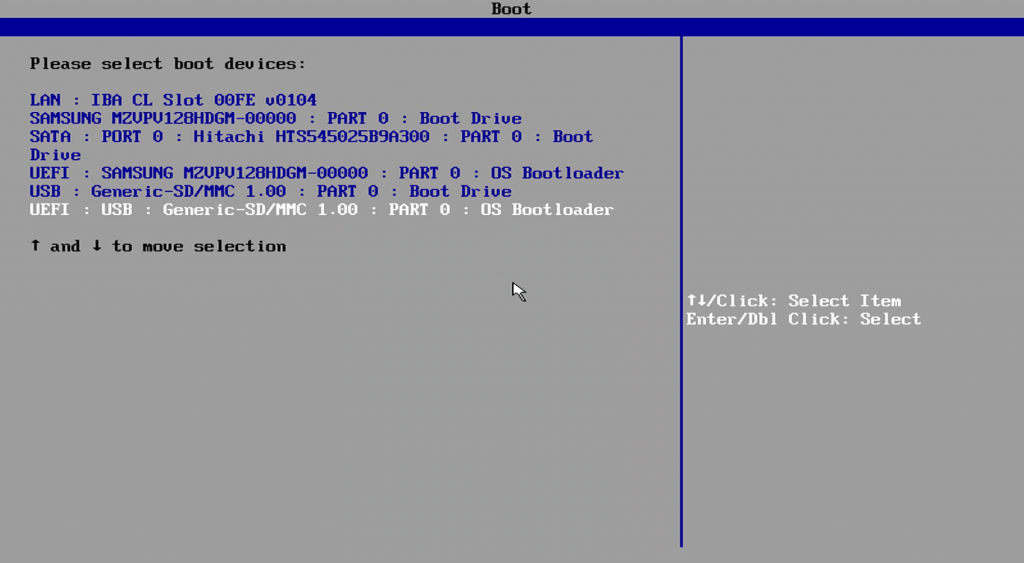
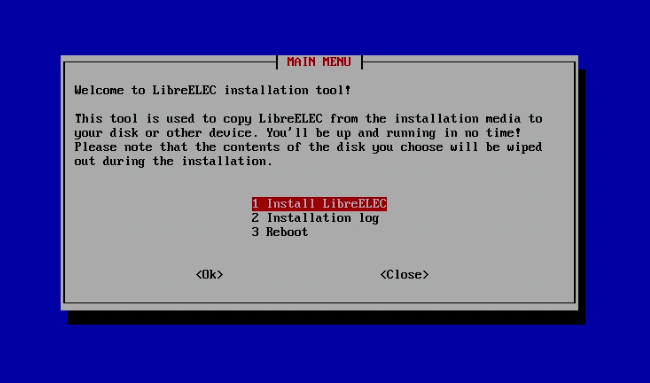
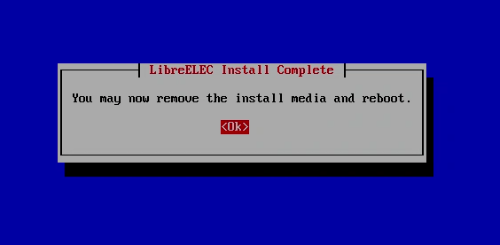
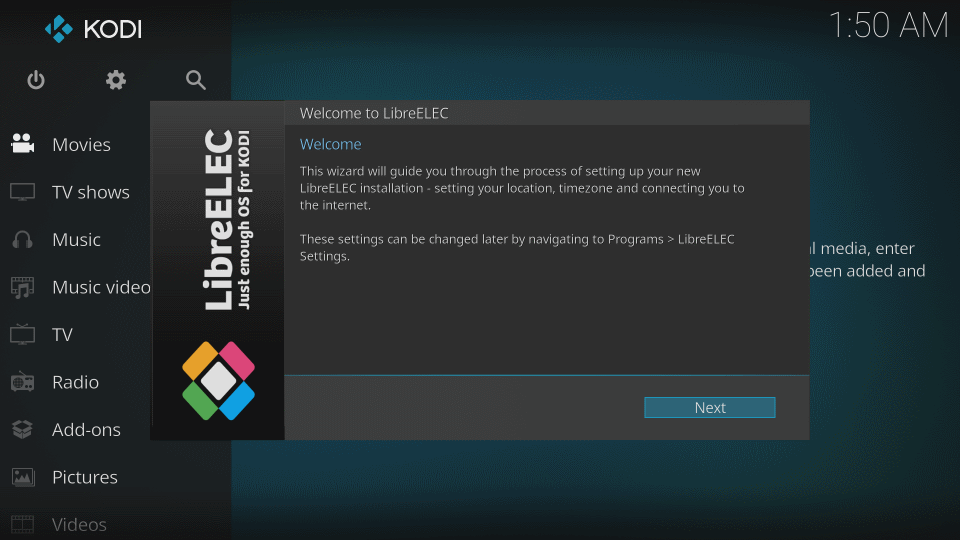
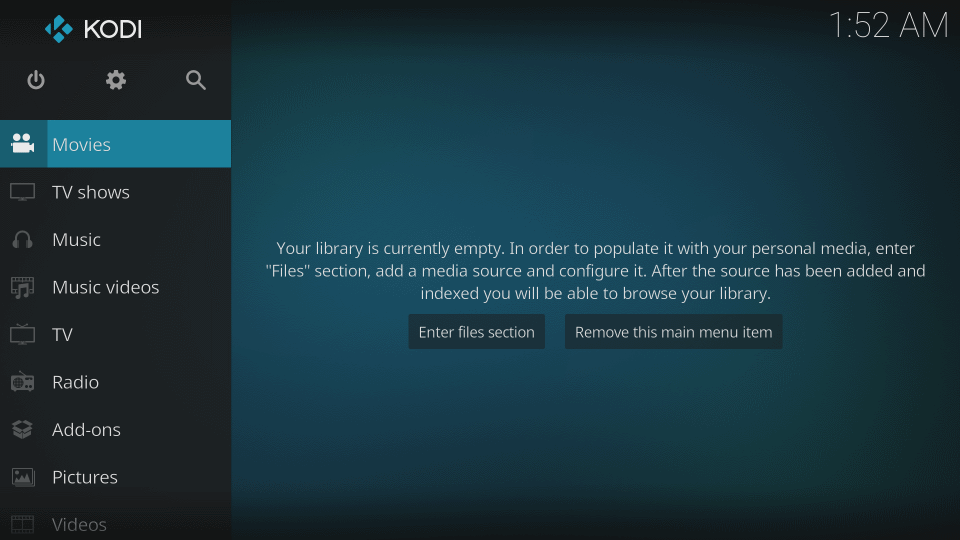
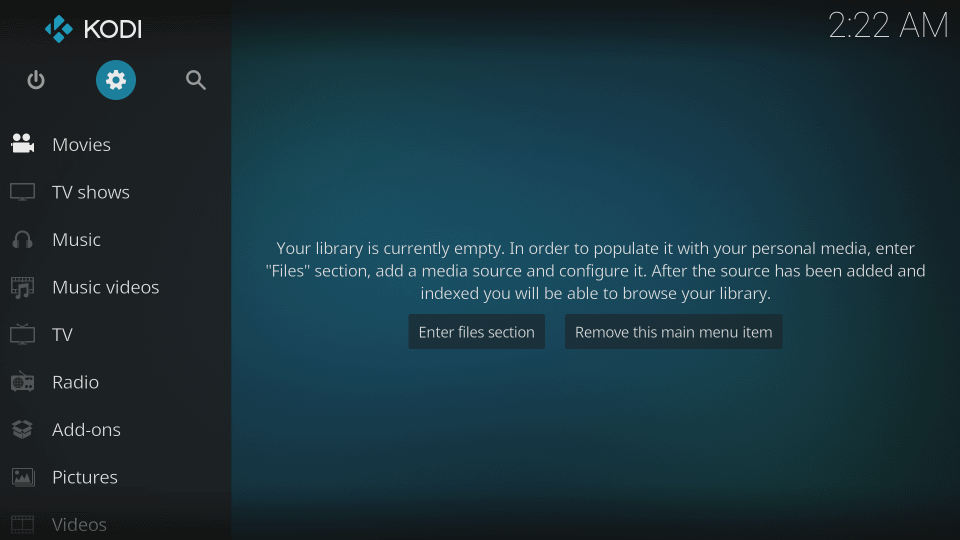
NEXT STEP: Install the Operating System with Kodi Media Player Software (LibreElec = Linux and Kodi)
 
Last edited:
STEP 2: Install the Operating System with Kodi Media Player Software:

We're going to install Kodi 17 (Code named Krypton) which is the current version at March 2018 by installing LibreElec Version 8 (free open source).

LibreElec is a Linux operating system distribution with Kodi included (with all drivers etc ready to run immediately after install). It is very small, requiring only 512MB of disc space, very fast and will run comfortably with little RAM. Kodi plays just about every media format from MCH audio to HD video.

You will needs to download the LibreELEC USB Creator (installer) program and run it on a PC or MAC (its a once off process).

The LibreELEC USB Creator program will download the latest LibreELEC and it will create an install image on a USB thumb drive/stick. The USB stick is then inserted into one of the NUC USB ports. On startup the NUC reads the USB stick and installs LibreELEC on the NUCs SSD drive (Linux and Kodi with drivers).

To download the LibreELEC USB Creator (installer) program go to this link and download the program on your PC or MAC. Select the version for your PC (Windows or MAC etc as you will run the USB Creator on your PC/MAC. Use one of the links near top of this page. You don’t need to download any other LibreElec files from this link, just the USB Creator program for your computer to use:

downloads – LibreELEC

Run the LibreELEC USB Creator on your computer:

1. Select Version: 'Generic AMD/Intel/NVidia' (see below)

LibreElecInstall1.PNG


2. Click: Download

The USB Creator downloads the LibreElec image for the NUC (see below)

LibreElecInstall2.PNG


When completed insert a USB thumb drive into a PC USB port:

3. Select your USB drive (WARNING: ENSURE IT IS THE CORRECT DRIVE!!!)

4. Click: Write

The program now writes the LibreElec installer image to the USB drive

LibreElecInstall3.PNG


5. When completed, remove the USB drive.

Now the USB drive is ready for you to use to install LibreELec on the NUC.

-----------------------------------------------------------------------------------------------------------------------
NOTE: To install LibreElec from the USB stick you will need to use a USB Keyboard. If you already have a USB keyboard or a wireless keyboard with USB dongle you are ok to use that. Otherwise you may need to buy something like this (any USB keyboard should be ok though):

Logitech K400 Plus (this works for me - it has a small USB wireless dongle, plug it in to the NUC) $25
https://www.amazon.com/Logitech-Wireless-Keyboard-Control-Touchpad/dp/B014EUQOGK
-----------------------------------------------------------------------------------------------------------------------

6. Connect your NUC to a TV screen (or PC screen with HDMI).
  • Insert into your LibreElec USB drive into a NUC USB port (at front on NUC).
  • Turn on the NUC.
  • Keep pressing F10 key repeatedly to bring up the boot menu (this is not the exact boot screen you will see but its close):
NOTE: If you have trouble booting from the USB Drive, boot the NUC again and hit your F2 key repeatedly until the BIOS screen appears. Then find the advanced boot options and uncheck 'Secure Boot', then save the changes and try STEP 6 again

NUC_boot_menu-1024x563.png


Use your arrow keys to select your USB key drive to boot from (UEFI: USB is recommended) then hite <Enter> key

Wait a while for the LibreELEC installer to start. This should take 15-30 seconds.

The main menu of the installer pops up. You use up, down, left and right arrow keys in the installer to move around and select an option by pressing enter.

LibreELEC_installer_main_menu.png


Select: 1. Install LibreELEC to start the installation.

Next you need to choose a drive where LibreELEC will be installed. You should see your SSD drive listed, select and hit <Enter>

After confirming that you really want to install LibreELEC on the drive the operating system will be copied to your NUC. This takes probably less than one minute, but it depends on the speed of your USB stick.

When the installation is complete, remove the USB stick and reboot the NUC.

LibreELEC_installer_complete.png


LibreElec is now installed.

That wasn't too painful, was it?

More info on the LibreElec Creator program here:
Create Media

NEXT STEP: Initial Kodi Setup
 
Last edited:
STEP 3: Initial Kodi Media Player Software Setup:

On first boot after LibreElec is installed you will see this screen (TV or computer screen, whatever you have connected to the NUC's HDMI cable):

----------------------
NOTE: The typical QQ setup will be: NUC -> HDMI Cable -> AVR HDMI Input -> AVR HDMI Output -> HDMI Cable -> TV/Monitor HDMI Input

Initially you will need a TV or monitor to complete the setup. However, it is possible to play audio only by using one of the Kodi Remote Control apps on a smart phone or tablet. With these devices a user can navigate through their media library and select songs or albums to play without a TV or monitor, the AVR/Amp will play the audio.

These smart phone/table apps require a local wifi network, with the devices 'talking' to the Kodi NUC via a ethernet connection to same network. You can control Kodi from anywhere in your home as long as your remote control device can connect to your wifi.
-----------------------


KSU0.png


We will accept the defaults for next 4 'wizard' screens, so just hit <Enter> on the keyboard or use the keyboards mouse to click [Next] until there are no more questions being asked.

After the initial first run setup wizard (above) is complete and you will see this screen:

KSU5.png


At this point your Kodi media library is empty. Before we start adding media (music/movies/concerts etc) we should set up Kodi with more typical settings for multichannel music playback:

Setup Kodi for Typical MCH music/media:

We will go to the Kodi Settings menu to make some one-off changes:

Go to the 'Settings' icon at top of the menu (it looks like a gear/cog - see top left below):

KSU6.png


Use the arrow keys and <Enter> key to select Settings (or use the mouse)

This will show the main Kodi Setting screen:

KSU7.png


Now navigate to the 'System Settings' menu (see above) and hit <Enter> (or click with a mouse)

Now the Settings/System screen is shown.

KSU9.png


Navigate to the bottom (gear/cog) option that defaults to 'Standard' and change that to 'Expert' (each click or <enter> on that item cycles this option:
Standard -> Advanced -> Expert -> Standard -> Advanced -> Expert ....

NOTE: Changing to 'Expert' mode gives you additional options needed to get down to 'number of channels' and 'AVR codec options' etc. You need these options to get optimal features from Kodi - don't panic, this is a once off setup for any new LibreElec/Kodi installation.

Now, in Expert Mode, on the side menu select: Audio

(First part Settings/System/Audio screen below)
KSU10.png


You need to set:
  • Number of Channels to your AVR's speakers: (mine is 7.1)
  • Output Configuration: 'Best Match'
  • Keep audio device alive: 'Always'
Scroll down to the next part of the audio options (see below):
KSU11.png


You need to set:
  • Allow passthrough: 'On'
  • Now set all your codec options 'On' for all codecs yor AVR can decode (I set all mine to 'On' as I have a recent AVR that decodes everything)
NOTE: If you don't set to passthrough Kodi will decode all those codecs to PCM and send that over your HDMI (I prefer to let my AVR do the decoding)

Now leave the System settings and select 'Player' settings instead. Important settings:

NOTE: The 'Esc' key will back out of your current screen (go back to previous menu/screen)

NOTE: There is no 'Save' in Kodi as soon as you make any change the change is made

System menu showing 'Player Settings' (go to Player Settings)
KSU12.png


Player Setting screen:
KSU13.png


Make the following Player Settings for Video:
  • Play next video automatically: 'On'
  • Adjust display refresh rate: 'On'
Go to the 'Music' menu settings and make these changes:
  • Play next song automatically: 'On'

That's it to get you going. However, I strongly recommend you go to the Settings menu 'User Interface' and set your Regional Settings (Country, Time Zone etc):

KSU14.png


NEXT STEP: Getting Music into the Kodi Library

EDIT: June 17 2020 - You can now setup your Kodi by Restoring a pre-configured zip file I created. Read the How To information in this post:
https://www.quadraphonicquad.com/fo...o-play-mch-from-a-configuration-backup.28486/
EDIT: June 17 2020 - Using a smartphone or tablet to control Kodi
https://www.quadraphonicquad.com/forums/threads/kodi-using-a-iphone-ipad-to-control-kodi.28514/
 
Last edited:
STEP 4: Getting Music into the Kodi Library

Kodi can connect to media USB drives plugged into the NUC's USB ports. It can also connect to shared drives on a PC connected to your internal home network or to a server such as a NAS (Network Attached Storage). I will just cover media on local USB drives in this thread.

Background:
Kodi is designed to store metadata about all your media files in its Library (database). Metadata is information like:

For Music:
  • Artist
  • Album
  • Year
  • Genre
  • Album Cover Art & Artist Fan Art (multiples)
  • Artist biographies and other info
  • Its location (which drive and folder to find it)
  • Number of times played etc
For Movies and TV:
  • Title
  • Director/Studio
  • Actors
  • Posters/Actor Photos and biographies etc
  • Ratings
  • Plot
  • Its location (which drive and folder to find it)
  • Number of times played etc
This metadata is stored in the Kodi database and allows you to search, find and play anything without any effort. In an ideal world you would have enough disc storage (USB drives or NAS drives) to have every media file (album. movie concert) you own 'online' so you can play anything by selecting from the on screen user interface (this beats trying to locate a disc and change discs!)

There are tools that 'scrape' more metadata and images automatically from the internet, but you must get the basic info in first like: Music: Exact Artist Name and Album Name. Movies: Exact Title and Year

Music without a Library: (short term this is ok but I strongly advise using Kodi's Library)
You can play music (and videos) by navigating a disc, folder and file structure. This will get you going. Just copy a few albums onto a USB drive, plug in the USB drive to your NUC and then do this:

(TBA)

Kodi Music Library:
The Kodi Music Library relies on all the files being tagged (metadata has already been assigned - there're many programs to help with this).

The idea is that you just set up a root folder (main folder) and all your music media goes under that folder (separated into album folders). You tell Kodi where that root 'Source' is and Kodi will start reading recursively through every sub-folder and file loading each media file's metadata (tags) and file name and folder location into the Kodi Music Library (database) ready for display in its user interface and ready for playback. This where a NUC with SSD drive really shines. My i3 NUC can do 1000 odd albums in about a 20th the time it takes (another) AMLogic media player with an SD Card to do.

Kodi works best if your folders are organised like this: (A strong recommendation but not mandatory)
[Root Folder]\Artist Name\Album Name\Album files

Once that's the source is scanned all you do is turn on the NUC and select something to play (by Artist, Album or genre etc, not by folder or file name)

Your goal should be to ensure all your music is ready for Kodi by tagging asap.

Please note that Kodi groups song files into albums by the 'Album Artist' and 'Album Name' tags. If you have two albums by Pink Floyd for Dark Side Of The Moon, one a 5.1 release and the other a quad (for example) you need to tag the album names differently, otherwise all the songs get added to the same album! Example to resolve, tag them like: 'Dark Side Of The Moon (5.1)' and 'Dark Side Of The Moon (Quad)'. So start preparing now if you think you may eventually want to use Kodi and you have many duplicate albums.

(more coming)
 
Last edited:
ADDING MUSIC SOURCES TO KODI:

Overview of Sources:

Media Sources are folders on a disc drive or NAS that contains media you want to consume in Kodi and add to Kodi’s Libraries. Kodi has Sources and Libraries for:
• Music (audio only)
• Music Videos
• Movies
• TV Series

These Kodi databases contain all sorts of information about each media file. For music, this includes for every audio file: its Source (disc and folder location and file name), the Album, Artist, Year, Track No., Genre, etc (the file’s tags) plus Length, codec information.

To get Kodi to read all this data there are two steps:
  1. Ensure the file is added to an existing Kodi Music Source folder (you need to create the Source if it does not already exist in Kodi)
  2. Tell Kodi to Scan the Source for changes (i.e. New albums/files or changed files)

How to Add a new Music Source:

Plug-in a new USB Drive that contains your music media (or ensure your device is connected to your network server). I will only cover USB drives.

From the main Kodi System Settings screen, select Media icon

From the Kodi Media settings screen:
screenshot007.png


Select the ‘Music’ setting in the Media settings screen, this brings up a new dialog showing your current Music Sources:

screenshot008.png


I recommend you also have your Kodi device connected to the internet at this point as the Scan will also fetches additional information about the albums and artists in your music collection

This USB drive will shown in the above list.

Now click on the USB Drive name, and you will see the root folders on the drive:

Navigate to the folder you want to add as a Music Source – DO NOT CLICK ON IT YET! If you accidentally click just navigate back up the folder tree by clicking on the ‘folder back …’ icon to get back to the above screen.


Depending on whether you have a remote control, keyboard or mouse. You need to do:
• Remote Control: Press and hold down the Select button
• Keyboard: Press and hold down the Enter key
• Mouse: Right-Click on the folder name

Kodi will pop-up a context menu:

KodiSources04.png


Select the option: ‘Scan Item to Library’

Click ‘Yes’ to the dialog to confirm the scan.

Kodi will now recursively scans every folder’s files and loads the data about each file into the Kodi Music Library database. It will also add Artist information and finds existing album and disc images etc. This may take some time if you have a large music collection. Kodi will also gather additional artist and album metadata from the internet (if your device is connected to the internet through your local network).

Once the Kodi Source Scan is completed you can go back to the main menu, select music and start playing your favourite albums or tracks.

NOTE: You can add more than one Music Source. Just repeat the above for each additional Source.
 
Last edited:
  • Like
Reactions: PK
Hopefully other QQ members will jump in too. And a few non members that hang out here too :hi

Seriously, having all my music on a media player (multichannel audio and concerts) and using playlists and an iPad to navigate while playing music is the single best thing that I’ve done for years! An absolute game changer.
 
Does Kodi play files gaplessly from a playlist? Where two songs are to have a smooth transition from one song to the other, does a created playlist allow the transition to occur without a gap?
 
Hopefully other QQ members will jump in too. And a few non members that hang out here too :hi

Seriously, having all my music on a media player (multichannel audio and concerts) and using playlists and an iPad to navigate while playing music is the single best thing that I’ve done for years! An absolute game changer.

OK HomerJau, I'm going to jump in! Unfortunately I haven't ripped my music discs yet so I'll at least get started with that first. Yikes:eek:

Looks like I'll need to start with one or two USB hard drives and a USB Blu Ray player. My desktop (Dell 5348) only has two USB ports that are 3.0 so I'm not sure if that's going to be an issue or not.

Also I found several of your threads which I'll do my best to study!!

1522532229568.png

1522532275984.png


Thanks for all the work you've done :)
PK
 
Great to hear you are jumping in PK!

If you have a desktop PC you could replace it’s current SATA DVD with a Blu-ray if it has one. They aren’t too expensive and will save you a USB 3.0 port.
 
  • Like
Reactions: PK
I've used Kodi on my laptop in my HTPC setup for years and it's really great. Just saw this today though:

Kodi No More!

It is however April Fools Day already in some parts of the world.
 
I just read an early review on the 2018 Intel NUCs which are just being released starting now over on the NUC Blog website.

The first models off the blocks are the low end (processor-wise) code named June Canyon. The good news is these support HD Audio pass-through over HDMI (the previous 7th generation NUCs did not). These first 2018 NUCs also support HD video, both 1080p and UHD/4K, but nothing yet on HDR (High Dynamic Range) video.

Here’s the link to the final part of a mini review that discusses using an early 2018 NUC as a HTPC (Home Theater PC) with LibreElec (Kodi):

http://nucblog.net/2018/04/gemini-lake-nuc-review-nuc7cjyh-linux-htpc-conclusions/

I will definitely buy the 2018 i3 NUC (code name Bean Canyon) as soon as it is released (3rd quarter) as I need UHD/4K HDR video, the June Canyon one mentioned in the review looks like it is going to do everything needed for QQ members wanting multichannel HD audio and 1080p (blu-ray) video (and UHD/4K video without HDR). However, LibreElec 9 is still in alpha (not released) so best to hold back until we get user feedback, unless you want to run on the bleeding edge.

Very promising though.

I will create a new Multichannel NUC Media Player thread and provide recommended parts and setup like this thread for the 2018 June Canyon (and others) as soon as more info becomes available (i.e. first users confirm it’s suitable for our MCH needs).

The advantage with June Canyon NUCs will be: Lower cost, support for UHD/4K video and comes with 2 HDMI outs. The NUC in the review is available now for under $250 with 4GB memory and a 120GB SSD drive, a little cheaper with a smaller drive. Great value for a MCH hires media player! (If it does what the review says)
 
Last edited:
OK HomerJau, I'm going to jump in! Unfortunately I haven't ripped my music discs yet so I'll at least get started with that first. Yikes:eek:

Looks like I'll need to start with one or two USB hard drives and a USB Blu Ray player. My desktop (Dell 5348) only has two USB ports that are 3.0 so I'm not sure if that's going to be an issue or not.

Also I found several of your threads which I'll do my best to study!!

View attachment 32545
View attachment 32546

Thanks for all the work you've done :)
PK
HJ,
I'd like to print these tutorials. Is it possible to post them as attachments in word docs?

Thanks, PK
 
Hey PK, you can just copy and paste anything written in threads into a word doc.

Garry, I have not pulled the trigger on that 4th gen NUC yet, do you think i should just wait for this new one?? because like PK i have an awful lot of converting to do first. I guess i'm not sure what HDR is and if i really need it.
 
Last edited:
  • Like
Reactions: PK
HJ,
I'd like to print these tutorials. Is it possible to post them as attachments in word docs?

Thanks, PK
...that's if you already have them in a printable file format...otherwise I'll copy and paste as Holland suggested...Thanks, PK
 
Back
Top